Tuesday, May 31, 2016

REFLECTION ON PROCESS OF METAL SHAPING


Devices use for digital making process
Smartphone
Laptop 
Camera

Software to download 
123D catch by Autodesk ( on smartphone ) either from App Store or Google Play for free
123D make by Autodesk ( on laptop )
Meshmixer ( on laptop )
Adobe Illustrator ( on laptop)

Tips and tricks on using software

123D catch
Avoid choosing objects with plain, reflective or transparent surfaces.
Draw different texture or color on mono colored object allows 123D catch app to capture the accurate shape of the object.
The object must remain still when taking a photographs with 123D catch app.
Try to take as much photos as you can from different angles to get 3D model generate smoothly.

Meshmixer
Clean up the excess surfaces of 3D model in meshmixer is important because we want 3D model to replicate the accurate contour of the object.

123D make
123D make can generate the templates to assemble 3D model through different construction methods depending on the material choice and thickness. Some object can only assemble through certain construction method and always good to choose the construction method that can replicate the form of object.

Adobe Illustrator 
The templates from 123D make upload to the Illustrator to change the outlines of the templates, red line indicate to cut through and blue lines are for engraving. Stroke weight needs to be changed to 0.0001 mm for successful cut.

Tips and tricks on laser cutting process
Laser machines should only operate by someone who trained to use machines. Carefully select the plywood and other wood sheets because bend plywood sheets tend not having successful cut.
After upload the templates on the laser-cutting lab computers, modify the printer settings according to the material( sheet) and check with laser focus tool to make sure that laser focus remain inside the sheet edges for successful cut. Don't forget to turn on the air filtration and wise to wear the mask due to the strong fumes produced from laser cutter. Assemble 3D model according to engrave numbers on templates.

Machines and tools for metal shaping
Guillotine ( to cut larger piece of metal)
Pan Brake ( to fold the metal sheet)
Roller ( to roll and curve the metal sheet)
English wheel ( to smooth out the metal skin)
Steel ruler
Tape measures
Scribes/ knife
Marking pen
Tin snip
Aviation shears
Hammers
Wooden mallets
Sand bags
Stakes/ dollie

Tips and tricks on metal shaping process
Machines and tools in the workshop should operate carefully due to safety.
Consult with the tutors in the workshop on how to approach to get the desire metal skin which contour nicely to 3D model and make a plan. Might not turns out exactly as the plan but can learn from the mistakes and failures. If you see someone who is doing well with their metal skin, ask them how they shape and what tools they use to get the desire shape. Always good to check regularly with 3D model as a reference because once the sheet was bent to a certain level, it is too difficult to bring it back. Try to stick with appropriate scale for 3D model, avoid large scale 3D model if you have limited time frame for metal shaping. Because the bigger the 3D model, the bigger area to contour with metal sheet and need more time to spend in the workshop. The more details show on 3D model, the more detail you need to contour on the metal skin. 
Interlocking 3D models work better for object with curved shape with not a lot of detail, where stacking 3D models work better for object with complex shape detail that can hammer on it directly to get the detail contour of 3D model. If your 3D model has complex shape, just try to shape the portion that shows just right amount of curves and details unless you have time because metal shaping is time and energy consuming process. I learnt this through my own metal shaping experiences, for my first skin I got Polaroid camera as my 3D model and it has complex shape. I tried to shape the whole 3D model with metal sheet and was a mistake because the skin turns out with a bit rough finish even though I spent a lot time and energy. If I cover only half of 3D model, I can polish the skin much more in details without wasting too much time and energy. But this kind of failure is precious because I can learn so much from the mistakes. I find my metal shaping process is so much easier second time around because I gain more experiences after the first metal skin and took an advice from Mathew ( landscape architecture student). 
The longer time spending in the workshop, the more familiar with the tools and easier to shape the metal sheet. Experimenting with different tools is crucial because only with the right tools, the desire result can be achieve. Helping each other in the workshop and taking turns to use the tools is fun part of working in the workshop. Important thing I learnt from this metal shaping experience was that working together with students from other discipline allow me to look at the things and obstacles from different perspectives. 

Sunday, May 15, 2016

INTERDISCIPLINARY METAL SKIN ( TREE TRUNK )

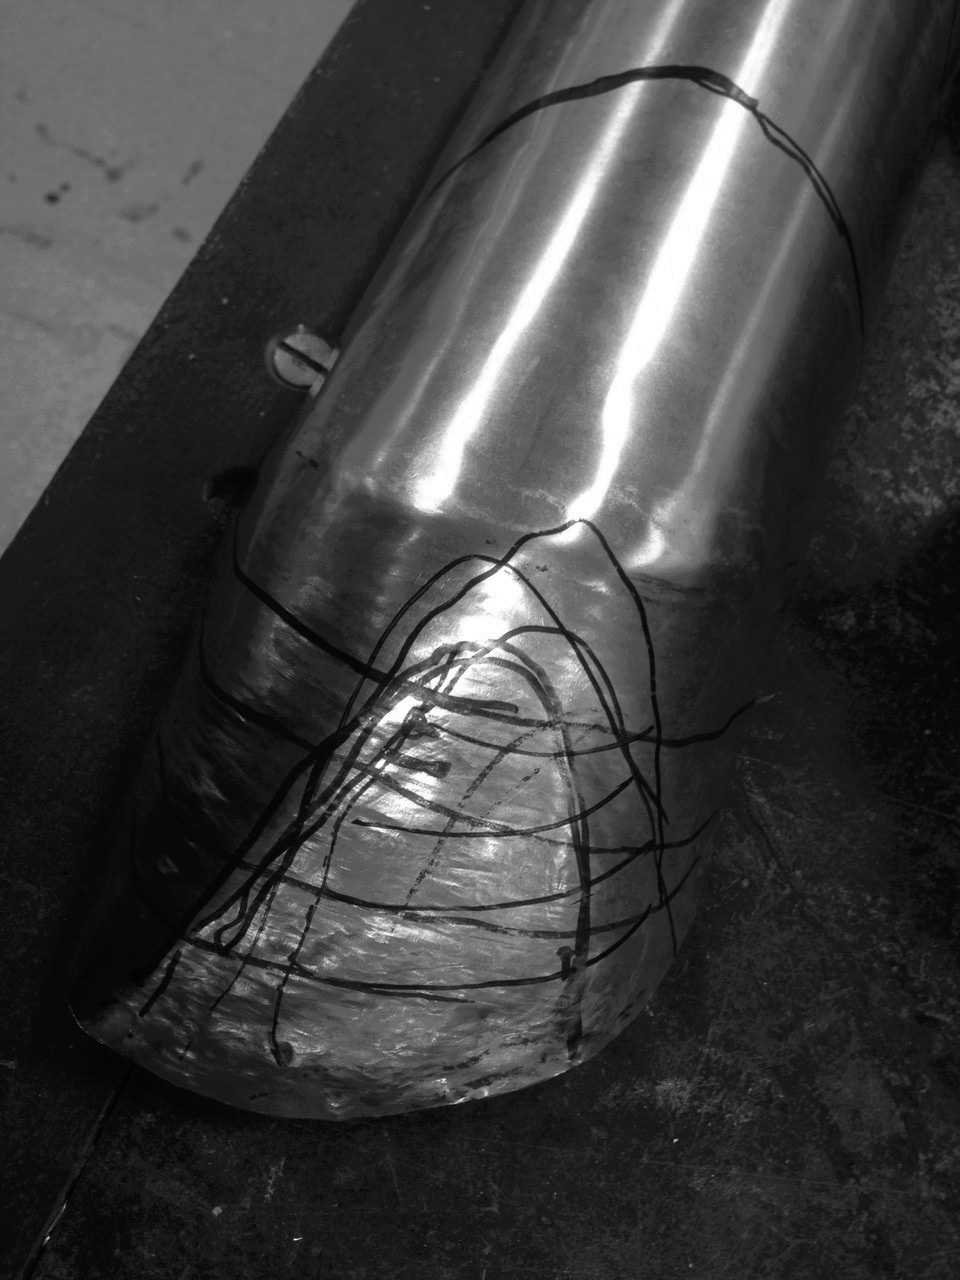
For my interdisciplinary metal skin, I decided to make Mathew's found object, which is a tree trunk. I met Mathew during our first tutorial class and he said he would like to make a metal skin of a tree trunk because it's reflect his degree 'Landscape Architecture'. Tree trunk is the basic raw construction materials use even before the other building material technologies developed and well reflected the built environment. He shared a couple of tips and tricks from his experiences in regards to working with his radical slices form-work of tree trunk. As the form-work is quite fragile and cannot be use as a base to hammer onto, unlike my previous camera form-work which is quite bulky and solid. 


He also suggested me not to get the skin to cover the whole trunk, which is too complicated and advised me to stick to one side of the trunk. I follow his suggestion and picked one side of the trunk, which I think it has more shape. 


The first step making the aluminium skin is to cut into 150 mm* 300 mm sheet just enough to cover the selected half of tree trunk form-work. 


Using the roller and fit the sheet to a suitable level and start bending to follow the curve shape of form-work. Need to check visually, because i don't want the sheet to over bend and stop rolling once I got the desired curve. 


Put the 3D model and rolled metal sheet to check if it fitting well and it is always good to use 3D model as a reference. 


Both curve end sides need to be flatten to fit in 3D model perfectly, I used the flat hammer to flatten the curve. 


After flatten out the both sides, the sharp edges are cut off to contour the 3D model. And started marking the skin to shape the contour. 


At this stage, I used this timber form work which curve shape is closest to 3D model as a base and start pushing down with mullet according to marked contour lines. Kept pushing down till I get the desired contour. Often use both hands to maneuver the metal to maintain the curve shape. 


Once the desired contour is achieved on one side, put the 3D model back into the sheet to mark out and cut off unnecessary bits on the other end. This allows me to save energy and time. 


Started marking the skin to shape the contour at this end. 

Using the timber form work as a base and start pushing down with mullet according to marked contour lines. Kept pushing down till I get the desired contour. 


It is good to check with 3D model regularly because once the metal sheet was bent to a certain level, it is too difficult to bring it back. Minimize the gaps between 3D model and metal skin for a better contour.

FINAL RESULT


I was fairly pleased with how the skin turned out at the end, thanks to Mathew’s kind advice throughout the process. The longer time spending in the workshop, the more familiar with the tools and easier to shape the metal sheet. Experimenting with different tools is crucial because only with the right tools, the desire result can be achieve. Helping each other in the workshop and taking turns to use the tools is fun. Important thing I learnt from this metal sheeting experience was that working together with students from other discipline allow me to look at the things from different perspectives which is beneficial for me as an Architecture student. This course prepare me to work in built environment with others in a professional manner. 


Monday, April 25, 2016

FOUND OBJECT

Polaroid Camera

Architecture Photography 

Personal Interest
          I decided to choose Instax mini Polaroid camera as my found object as the camera usage in Architecture dated way back to 1385, the first architectural photograph View from the window at Le Gras was taken by Nicephore Niepace. Buildings have been highly valued photographic subjects, mirroring society's appreciation for architecture and its cultural significance throughout decades. Architectural photography usually utilized as an established visual medium. As an architecture student, we usually refer the photographs of Iconic buildings to study history of architecture and I love taking photographs because they always remind me of good memories in my life that I can never go back.
           But in these digital era, someone might ask 'Why Polaroid and not digital camera?'. One big benefit of instant film cameras is the instant gratification that they provide those who use digital have the ability to see their pictures right after snapping them yet they still have to go somewhere, upload, and print in order to get a tangible, hard copy of their image. With instant film the process is far simpler, just snap and waits for the print to shoot out the side, where it will magically develop within just a few minutes. The images produced by instant camera film are different from those produced by digital cameras. They have their own fuzzy, retro look, and a white surrounding block that safely encompasses the image like a frame.
          Pictures produced through instant film have a unique look that can never be totally duplicated, as hard as online digital photo-editing applications may try. Using an instant film camera while travelling is a great way to capture fun, candid shots, and can give away the photos as a souvenir to new friends you meet during the trip. The photos from instant camera have a one-of-a-kind quality that cannot be replicate. Polaroid-style pictures make great additions to scrapbooks. They present a small white patch at the foot of the image that is perfect for adding the date, time, or subject's name. They also look funky and retro, against digital and conventional prints. Taking good instant photos requires talent and a sharp eye. There are no do-overs or edits. It is a unique hobby that will certainly set you apart from your digital point-and-shoot companions. Even the nicest, most-advanced digital camera cannot rival the looks of interest and admiration that follow a person cool enough to whip out a trendy new Fuji Instax and start snapping away. 

Digital Making- 123D Catch( Photogrammetry) & Meshmixer

          To be able to generate 3D model from photograph for my object, I downloaded 123D catch software(3D scanner) from app-store to my i-phone.  


          For a clean and better result of the 3D model, I scribbled with different color sharpie marker on my camera to make it easier for the app to focus on various angles of the object because objects with plain, reflective, transparent surfaces will not work on 123D catch. The object must remain still when taking the photographs.


          Started shooting a loop of approximately 20 sequential photographs in small increments about my object and took another loop from a different angle for better result . The app actually guided me through to get the different angles with highlighted segments and helped me navigate during the process.


          I tried to frame and focus on the whole object as I was shooting and upload the photos to the cloud to create and save 3D model of the object.


3D model of the object generated by 123D catch

                   Downloaded Meshmixer software to my computer and open .stl file of the object from 123D catch. To clean up the excess 3D environment capture from 123D catch, lasso and paint select tool are used and ready to import the model to 123D make. 

Final 3D model in Meshmixer after clean up the excess surfaces


Digital Making- 123D Make

          123D Make free software is downloaded to the computer to turn my 3D model into 2D build plans for laser cut to build form-work and assisted with animated assembly instructions. Uploaded 3D model to 123D make as (.obj) file from Meshmixer app.

3D model in 123D Make

          The panel on the left side in 123D make, there is the manufacturing settings which allow me to change the size and scale of the object, the sheet properties, and the selected construction technique. The gear button beside 'Manufacturing Settings’ allow me to set the sheet properties depending on the dimensions, type, and thickness of the material. After specifying the properties, the app indicated the number of sheets and templates for me according to the construction technique that I choose. Click 'Select Technique' button and explore various construction methods suitable for my object to create templates:


Stacked slices
          I decided to use horizontal stacked slices because of clear defined curves and indents shown and simple construction to make a mold of my object. I also want my form-work to be structurally stable and able to resist stress from hammering on when creating the metal skin later on. I needed to use 4 sheets of 3mm plywood 600*300 to build the form-work. 

Interlocked Slices
          Interlocked slices had some error in the model and the form-work could not be done
Radical Slices
          Radical slices had some error in the model and the form-work could not be done
Curve
          The grooves generated were at an angle indicated that cut out pieces are difficult for assembling a form-work. Once the final decision is made, the final templates PDF files are saved and ready for laser cut


Digital Making- Laser Cut and Form-work Assemble

Preparation for laser cut

          PDF files saved from 123D make were uploaded and opened in Adobe Illustrator and the colours of the outlines were changed to make sure that the outline of the templates need to be cut are red, and the numbering are blue just to get the scratched useful as a guide in assembling the cut out pieces for form-work. Stroke weight needs to be changed to 0.001 mm for successful cut. Used 4 sheets of 3mm plywood 600*300 for laser cut (check the quality of the plywood to make sure it is not bent for successful cut through the sheet).


PDF templates for laser cut

          Saved (.AI) files from Adode Illustrator after setting and opened those files in laser cutter application. Opened the laser cutter printer application and setting the material to natural plywood with cutting depth of 3.5 mm added extra 0.5 mm for successful cut because plywood sheets were bend. Turned on the laser cutter. Placed the plywood on the laser cutting bed and adjusted the focus point of the laser cutter using the focusing tool to make sure all the templates are within the boundaries (repositionthe the sheet if needed). Shut the lid, turn on the extractors and press play button. Approximate cutting time was 6 mins for each sheet, repeated the same process for each sheet. Regardless of the extractors,wise to wear the mask because of the strong fumes produced from laser cutter for Health & Safety.

Cut out plywood sheets

                                        
Total 50 pieces were stacked to test the alignment
          Top 12 layers were decided to removed to test on another possible Polaroid camera shape

Constructing the form-work

          Used UHU glue to assemble the form-work and the alignment holes from laser cutter guided the alignment of the model.


Final form-work and ready for metal shaping