Step 1: Choose your found object

Polaroid Camera
Step 2: To be able to generate 3D model from photograph for the object, download 123D catch software(3D scanner) from app-store or google play to your smart phone.

Step 3: If your object is mono color like mine try to scribble with different color sharpie marker on the object to make it easier for the app to focus on various angles of the object because objects with plain, reflective, transparent surfaces will not work on 123D catch. The object must remain still when taking the photographs.


Step 4: Start shooting a loop of approximately 20 sequential photographs in small increments about the object and took another loop from a different angle for better result . The app actually will guide you through to get the different angles with highlighted segments and help you navigate during the process.


Step 5: Try to frame and focus on the whole object as you are shooting and upload the photos to the cloud to create and save 3D model of the object.


3D model of the object generated by 123D catch
Step 6: Download Meshmixer software to your computer and open .stl file of the object from 123D catch. To clean up the excess 3D environment capture from 123D catch, lasso and paint select tool can be use and ready to export the model to 123D make.


Final 3D model in Meshmixer after clean up the excess surfaces
Step 7: Download 123D Make free software on your computer to turn the 3D model into 2D build plans for laser cut to build form-work and to follow animated assembly instructions. Upload 3D model to 123D make as (.obj) file from Meshmixer app.

3D model in 123D Make
Step 8: The panel on the left side in 123D make, there is the manufacturing settings which allow to change the size and scale of the object, the sheet properties, and the selected construction technique. The gear button beside 'Manufacturing Settings’ allow to set the sheet properties depending on the dimensions, type, and thickness of the material. After specifying the properties, the app indicated the number of sheets and templates for you according to the construction technique that your prefer. Click 'Select Technique' button and explore various construction methods suitable for your object to create templates:

Stacked slices

Interlocked Slices

Radical Slices

Curve
Step 9:Choose the suitable constructing method that can best replicate the form of your object.
Step 10: Upload PDF files saved from 123D make and open in Adobe Illustrator. The colors of the outlines need to change making sure that the outline of the templates need to be cut are red, and the numbering are blue just to get the scratched useful as a guide in assembling the cut out pieces for form-work. Stroke weight also need to change to 0.001 mm for successful cut. Select the material ( sheet ) for your 3D model according to the templates indication. ( if you want to use the plywood, check the quality of the plywood to make sure it is not bent for successful cut through the sheet).


PDF templates for laser cut
Step 11: Save (.AI) files from Adode Illustrator after setting and open those files in laser cutter application. Open the laser cutter printer application and set the material setting according to your material/sheets. Turn on the laser cutter. Place the sheet on the laser cutting bed and adjust the focus point of the laser cutter using the focusing tool to make sure all the templates are within the boundaries ( re-position the the sheet if needed). Shut the lid, turn on the extractors and press play button. Approximate cutting time is about 6 mins for each sheet, repeat the same process for each sheet. Regardless of the extractors,wise to wear the mask because of the strong fumes produce from laser cutter for Health & Safety.

Cut out plywood sheets


Total 50 pieces were stacked to test the alignment


Step 12: Construct the form-work according to the selected construction method. Stacking construction need glue to assemble but pieces can be interlock with each other for interlocking construction. Numbering on templates can be use as a guide to put the pieces together.


Final form-work and ready for metal shaping
Step 13: SAFETY FIRST ( Always aware that hazards are very common in workshop and protect yourself with PPE )
Common hazards and protective measures:
There are common hazards associated with the equipment while working on metal skin - for each hazard, there are measures need to take to stay safe:
Hazard: Flying objects.
Protection: Always wear approved eye protection (safety glasses, goggles, face shield or a combination of these) whenever machines or any other process are being used in the workshop.
Hazard: Loud noise.
Protection: Always wear approved hearing protection (ear muffs or ear plugs) whenever machines or any other noisy processes are being used in the workshop.
Hazard: Dust.
Protection: Always wear an approved dust mask whenever dust is being generated.
Hazard: Entanglement.
Protection: Always wear sensible, tight-fitting clothing, constrain or tie back long hair, remove jewelry and anything else that can pull you into a machine.
Hazard: Slips, trips, falls.
Protection: Always keep your work area clean and free of trip hazards before you start a task - also, periodically clean the area while you are working.
Hazard: Distractions.
Protection: Always stay focused on your tasks: switch-off your phone when in the workshop and never talk to people when operating equipment.
When working with sheet metal we are working with potentially dangerous materials, tools and equipment
To work safely with sheet metals you need to take into account that:
o the materials have sharp edges and corners and, if not handled carefully, can cut you (sometimes badly) I experienced minor cut during the process.
o the tools have sharp points or edges that can cut, scratch or puncture you if not handled correctly;
o the equipment can crush / amputate fingers if not used correctly.
Also, protect yourself by:
o wearing eye protection (especially when working thin springy material that may jump up into the face). This also applies if some of us are a bystander or helper;
o wearing gloves (especially when you are handling large heavy sheets);
o not wearing gloves when you are working with machinery that rotates, like the slip rollers, that can grab your glove and pull you in;
o wear hearing protection when it starts to get noisy( in my case the whole time because a lot of students in the workshop at the same time);
o careful when you are near others who are carrying or positioning larger pieces of sheet metal (you might get cut when they turn around);
o not removing guards that are put there to protect you and others;
o wearing suitably sturdy clothing and shoes.
The other aspect of workshop safety when working sheet metal is how the material is placed and stored. It is dangerous to leave sharp edges hanging over the edge of the bench or sticking into a walkway, where somebody can walk into it and cut themselves. Or to leave sharp shards lying about on the floor.
Tips: Making things in sheet metal can be somewhat difficult and if you can't get your folds in the right place. Your piece might turn out terrible and doesn't work at all. The accurate marking out when working with sheet metal is very important. Mistakes can be costly and waste of valuable time.
Step 14: Use following tools when marking out the metal sheet:
o steel rule
o tape measures
o scribes / knife
o marking out blue / marking pen
To achieve the accurate marking, draw the line as thin as possible by using a scribe that leaves a fine scratch (which is often difficult to see). To make the fine line more visible the area to be mark can be cover with a marking pen which is then scratch through to leave a fine shiny line. Curve lines can mark out by using a prick punch to put a series of dots along the line to make it easier to cut out.
Use hand tin snip, aviation shears to cut, reshape or modify sheet metal parts and hammers, wooden mallets, shot bag, stakes / dollies as forming tools. I found out that some of the tools require a deal of strength to use and if used for long periods of time could lead to overuse injuries, to avoid this wise to take regular breaks especially when your hands and arms are feeling tied and sore. None of these tools are particularly easy to use and to use well takes a fair amount of practice.

Step 15:Use the guillotine designed to cut sheet metals, in this case Aluminium sheet. Slide the aluminium sheet under the guard and line the cut line up with the edge of the bottom blade by looking through the gap between the top blade and the guard. Once the sheet is in the correct position, press down on the sheet to stop moving then push down on the foot pedal to complete the desire cut (make sure no one is around the foot pedal).

Step 16: Once you have the accurate metal sheet for the metal skin, use Pan Brake to fold the sheet according to the form-work.


Step 17 : After that try to cut out the unnecessary pieces with tin snip(the edges are extremely sharp and I had a minor cut). Try to place the cut off pieces one by one into the bin as soon as you finished cutting to prevent hazard towards others.

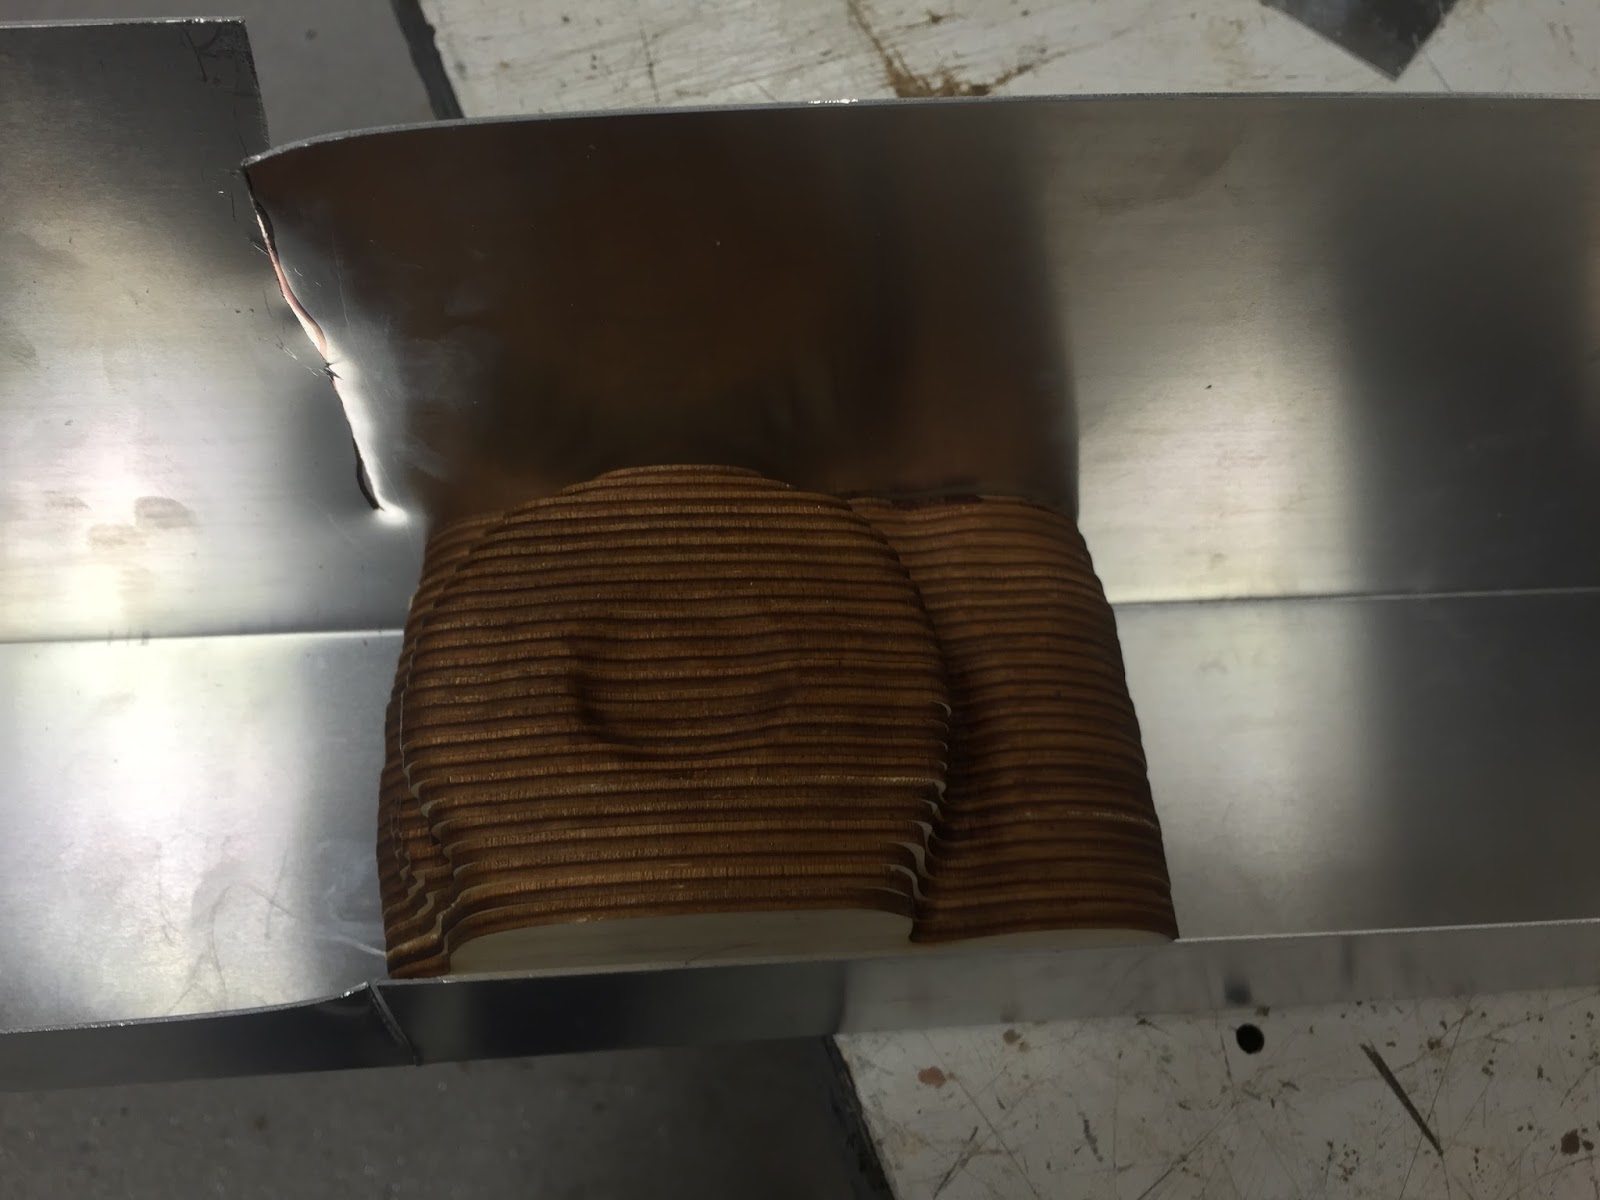
Step 18: Use the clamp attach to the working bench to firmly hold the form work and start hammering constantly with hammers and mallets to shape the metal skin based on the form-work.


Final metal skin for the form-work
Tips: Try experiment with all the tools and different shaping methods in the work shop and work your way through with the tools and the methods which are best to contour your 3D model.
No comments:
Post a Comment